谈到android root,我们自然会想到root管理工具,例如Superuser和Supersu。这里我们学习下Superuser的实现原理。
Superuser是开源的,所以网上存在很多的版本,这里我们使用此源码。
编译
Note: 这里使用的项目大多都很长世间没有更新了,所以编译过程会遇到各种问题。
配置编译环境
安装 NDK 和 SDK Platform for API 19下载源码
1
2
3
4
5mkdir /path/to/src
cd /path/to/src
git clone git://github.com/phhusson/Superuser
cd Superuser
git clone git://github.com/phhusson/Widgets编译su
- 确保
ndk-build在PATH中或者通过sudo find / -name ndk-build找到ndk-build所在的位置。 - 指定NDK编译项目的路径
export NDK_PROJECT_PATH=/path/to/src/Superuser/Superuser。 编辑/path/to/src/Superuser/Superuser/jni/Android.mk,在文件开头加入一行APP_ALLOW_MISSING_DEPS = true。编辑/path/to/src/Superuser/Superuser/jni/Application.mk并添加一行NDK_TOOLCHAIN_VERSION = 4.9。 - 执行
ndk-build
- 确保
编译superuser
1
2
$ cd /path/to/src/Superuser/Superuser
$ ./gradlew assembleDebugNote:因为这里的gradle版本太老,如果JDK太新的话编译会出现错误。这里我用的是
openjdk version "1.8.0_162"。编译测试app
这里的测试app使用此处源码。下载源码,并使用android studio打开。如果遇到Gradle sync failed: No service of type Factory<LoggingManagerInternal> available in ProjectScopeServices.这个错误,参照此处进行修改。我是通过将依赖classpath 'com.github.dcendents:android-maven-gradle-plugin:1.3'改成classpath 'com.github.dcendents:android-maven-gradle-plugin:1.4.1'解决的。安装superuser
我们把所有我们后续需要的文件拷贝到一处。
1
2
3
4
5
6
7
8
9
10
11
$ cp /path/to/src/Superuser/Superuser/libs/x86/su ~/tmp
$ cp /path/to/src/Superuser/Superuser/build/outputs/apk/Superuser-debug.apk ~/tmp
$ cp /path/to/testapp/libsuperuser_example-debug.apk ~/tmp
$ tree ~/tmp
.
├── libsuperuser_example-debug.apk
├── su
└── Superuser-debug.apk
0 directories, 3 filesnote: 我们使用x86的模拟器,所以要拷x86版本的su
后面的相关操作都会在模拟器上进行。首先我们启动模拟器,并将测试程序libsuperuser_example-debug.apk安装到模拟器上。
1
$ emulator -avd Nexus_5X_API_19 -writable-system
note: 使用-writable-system参数来启动模拟器,否则后面可能无法以读写模式重新挂载/system

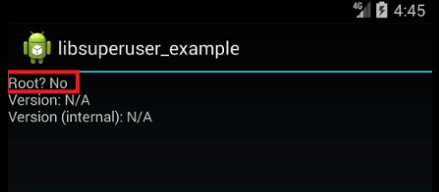
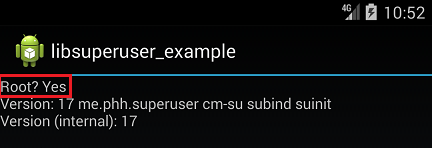
可以发现测试app检测结果是当前手机并没有root。我们将superuser和su安装到模拟器上。
1
2
3
4
5
6
7
$ adb shell mount -o rw,remount /system
$ adb push ~/tmp/su /system/xbin/
~/tmp/su: 1 file pushed. 26.8 MB/s (476204 bytes in 0.017s)
$ adb shell chmod 06755 /system/xbin/su
$ adb push ~/tmp/Superuser-debug.apk /system/app
~/tmp/Superuser-debug.a.... 121.8 MB/s (1005843 bytes in 0.008s)
$ adb shell /system/xbin/su --daemon/system/xbin/su的用户和组都是root,并且setuid和setgid,所以su可以被非root用户调用且以root权限运行。
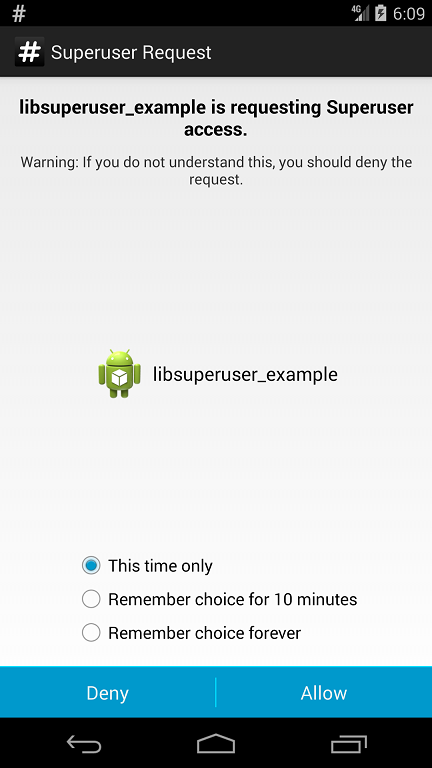
此时我们点击测试app右下方的刷新按钮,superuser会提示我们是否进行su授权,我们点击确定。
superuser实现
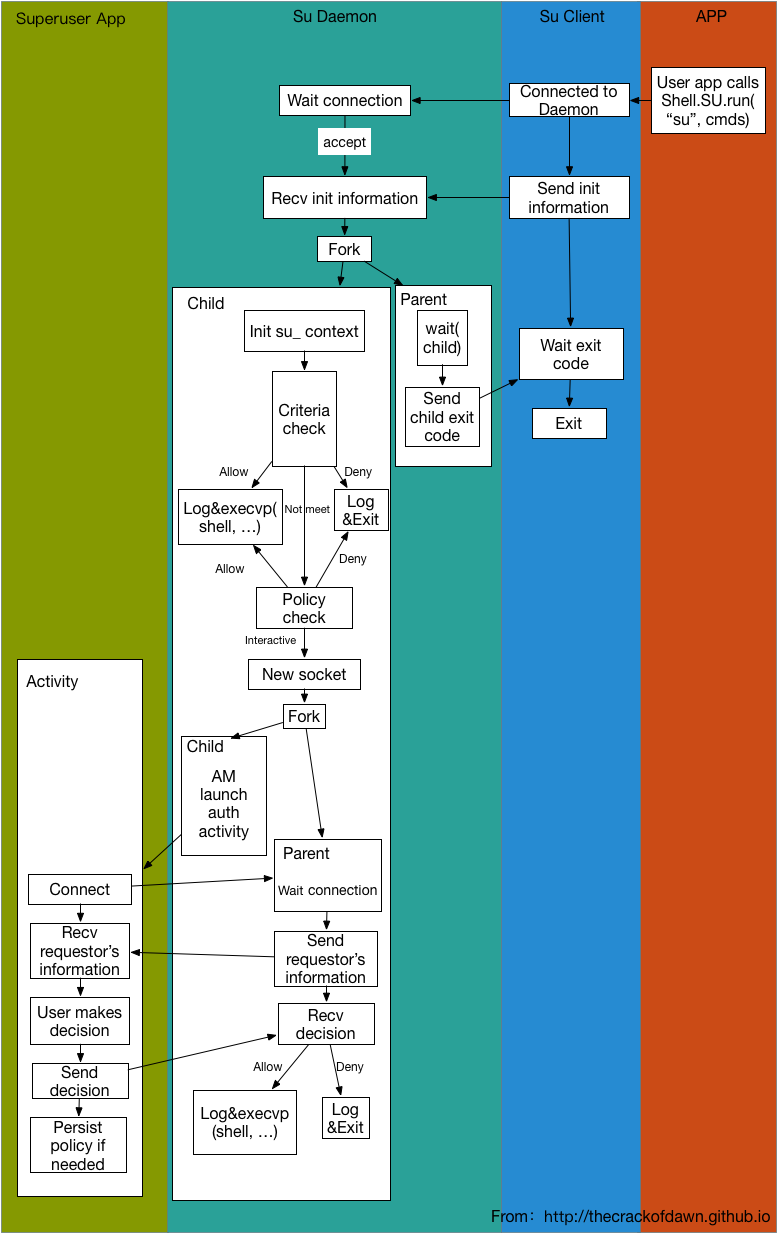
有了感官上上认识,下面我们就开始撸代码。首先上su在启用daemon情况下的简化流程图。这个流程图忽略了一些细节,只是把个人认为比较重要的部分画了出来。

这里只描述在daemon模式下superuser的工作原理。在上面演示的过程中我们在shell中手动通过adb shell /system/xbin/su --daemon将su的daemon端启动起来。在实际的root手机中daemon是在手机启动时由系统自动启动起来的。Su Daemon启动起来之后会启动一个socket并等待Su Client的连接。在这个过程中有一个有趣的函数:
1 | int fork_zero_fucks() { |
可以看到这个函数的名字甚是不可描述,所以说不要惹程序员,否则你不知道我们会在代码里写什么😁。这里把作者当时的commit log贴上来
1 | Submitting to POSIX C standard: fork_zero_fucks. |
可以看出作者不关心子进程状态也不希望产生zombie进程,所以用了两次fork。关于zombie可以看下这里。
当app通过suResult = Shell.SU.run(new String[] {"id", "ls -l /"});来调用su的时候,最终会通过Process process = Runtime.getRuntime().exec(shell, environment);来启动su。其中shell是”su”。
此时su以client模式被调用。Su Client被启动后会去连接Su Daemon。连接后Client会向Daemon发送pid,uid,命令行参数等初始化信息,并等待Daemon的ack。Daemon收到Client发送过来的信息后,会发送ack给Client。然后Daemon和Client会把它们的STDIN和STDOUT打通,即Client的STDIN的输入会被转发到Daemon的STDIN,Daemon的STDOUT的输出会被转发到Client的STDOUT。然后Client等待Daemon发送exit code, 收到exit code后Client便会退出。因为Client和Daemon的STDIN和STDOUT已经被打通,后面用户输入命令的便会从这个通道交互。Client的任务基本就是这些。
Daemon收到初始化信息后,便会fork一个进程。父亲进程会wait子进程,并将子进程的exit code发送给Client(前面说过Client在等待这个exit code)。子进程先初始化su_context,su_context结构如下所示:
1 | struct su_context ctx = { |
su_context初始化之后,便会进行预先的条件检测。满足允许条件的会直接允许用户su的请求,满足拒绝条件的就退出。允许和拒绝对应的执行函数为static __attribute__ ((noreturn)) void allow(struct su_context *ctx)和static __attribute__ ((noreturn)) void deny(struct su_context *ctx)。allow函数会通过execvp执行一个sh。预先条件有:如果su调用者的uid是root就允许调用请求等。如果预先条件没有匹配,便会去查询DB中存储的Policy。查询Policy会返回三种结果:允许,拒绝,交互。如果是允许和拒绝,也会相应的调用allow和deny函数。在交互情况下,Daemon会新建一个socket,然后fork一个子进程。父亲进程等待socket的连接。子进程通过AM命令启动superuser的相关activity,并将socket等信息传递给activity。
被启动的相关activity会去与socket建立连接,建立连接后Daemon会发送调用者pid,uid等信息。superuser收到这些信息后,会把这次请求的具体信息显示给用户。

用户做出选择后,supersu会把用户决策信息发送给Daemon。然后判断用户的决策是否需要保存,如果需要保存的话,就保存到DB中。Daemon在收到用户的决策后用相应的执行allow和deny函数。在没有参数执行su的情况下,allow会通过execvp执行”/system/bin/sh”。前面我们讲过Client和Daemon的STDIN和STDOUT是互通的,这样Client端的输入都会这个execvp启动的sh中执行,并在Client的STDOUT输出结果。
su何去何从
最近Chainfire宣布停止维护其全部root应用,而我们这里分析的superuser也是许久没有维护了。或许对于大多数android用户来说,root已经没有那么重要了。不管怎么样,抱着学习的态度看看superuser的源代码还是值得的。